

Deconstructing The Lava Egg
By Elaine Ng - Wednesday, Jul 04, 2012
Ramen aficionados will often recognise the ni-tamago (Japanese hard-boiled egg with a runny centre) accompanying a bowl of hot ramen as a telltale sign of the quality of the ramen establishment. But chefs and transient cooks (the ones that reluctantly inherit the technique from master chefs) are often fraught with several pressure points such as the volume of water, fire ferocity, as well as timing, and this all seductive, lava egg, can often be turn off- it can come looking and tasting like its nicely done but had sat on the warmer rack for a tad too long.

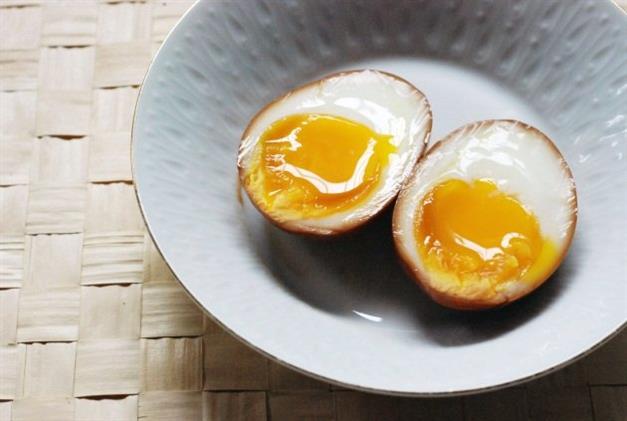
When done well, the fascinating ni-tamago—with softly firm whites and creamy and runny golden yolks—impresses because of its simple sophistication and the sheer contradiction in texture. With just a sterilised needle and a hot pot ladle, you can recreate the ni-tamago in your own kitchen as a cheap but luxuriously delicious addition to your instant noodle supper, or simply as an alternative to a soft-boiled egg breakfast. Warning – a lot of patience is needed.
Ingredients
(A) For ni-tamago
2 medium-sized chicken eggs (from the fridge)
1 ice bath, several ice cubes in plain tap water bath enough to have your eggs submerged
(B) For marinade
2 cups water
1 cup Japanese light soy sauce
2 tbsp dark soy sauce
1tbsp Mirin (sweetened Japanese rice wine)
1/4 cup, Brown sugar
8 slices of ginger, thumb size
Directions
1. Have the water in pot with a depth twice the height of your eggs. Bring to a boil then reduce to a simmer till only little bubbles can be seen. The water should not be swirling.
2. Meanwhile retrieve eggs directly from fridge as you wait for water to boil. They should be cool. For greater result, make a small needle hole on the sharper end of the egg. You will be flash boiling the egg so be careful when lowering the egg in the pot or they might crack and upset the process.
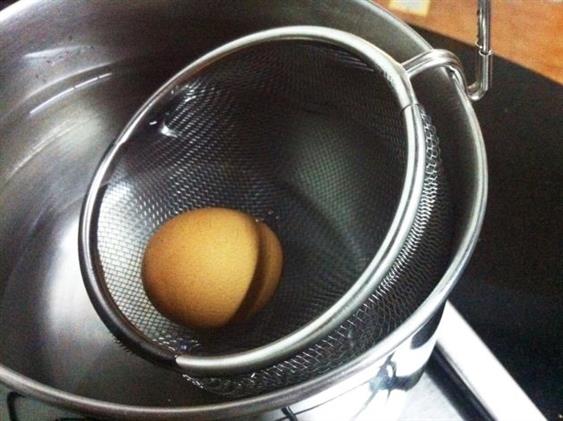
3. Lower the eggs into the pot of simmering water slowly. Be careful not to drop them with a plonk for you may break them. Here, you may use a hot pot ladle to lower the eggs in.
Tip! If your strainer ladle comes with a little handle hook (SGD2 from Daiso) that enables you to hold the egg nearer to the surface, it would help you achieve an evenly runny yoke, rather than having it sit at the bottom due to direct contact with the heat source.
4. Let the eggs cook for 6 to 8 minutes, depending on how runny you wish for it to be. I prefer my ni-tamago more runny, warming it up in the hot broth of my ramen which may cook the centres a tad further and thus making it a little less runny.
5. While you are waiting for the eggs to be cooked, prepare the ice bath and place the pot into the refrigerator to hold the temperature. Some recipes called for malt vinegar but I found that plain tap water with loads of ice works just as well for me. Now, be patient and have your egg cool in iced cold water for 4 to 5 hours.
Tip! Though not a necessary step, the malt vinegar softens the shell and this helps the peeling of the egg, especially when one may get a little more clumsy than usual when peeling and is anxious to find out if his ni-tamago is a success.
6. If you want your ni-tamago braised, make this simple soy sauce marinade. Combine all (B) ingredients in a pot and bring to boil. Stir occasionally to make sure all is smoothly dissolved. Leave the marinade to cool completely before you put the eggs in—or you will cook the centres unintentionally. If you wish for a completely brown egg, marinade overnight. If you only want to flavour the egg and colour it on the outside, 4 to 5 hours would be more than sufficient.
7. Finally, hold your breath, slice your ni-tamago open with a sharp knife or string, and see if it is a success!
Please don’t be dismayed if you fail the first time. I have tried to be as detailed as possible but, as mentioned, there are several pressure points in creating the ni-tamago. So, watch the fire well (low to medium)and check the timing, as well as the depth of the water in your pot to find out what went wrong and try again. And when you are done, move on to quail’s egg (shorter cooking time of two to three minutes)—for it is very gratifying to pop a baby ni-tamago into your mouth and enjoy the oozing lava!